반응형

0. VS Code에서 Cloud Run extension 설치
1. 스크립트 준비
2. 배포
3. 확인
0. VS Code에서 Cloud Run extension 설치
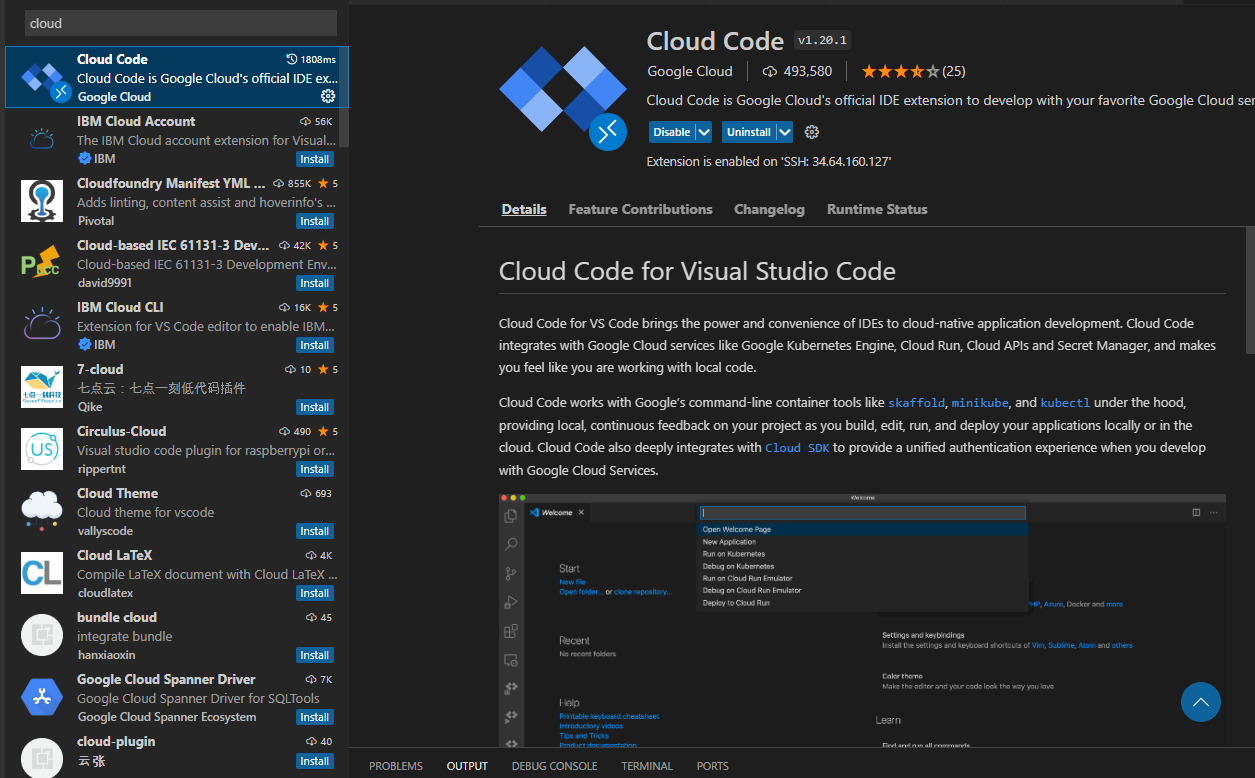
- VS Code extension에서 Cloud Code 검색하여 설치
1. 스크립트 준비
- 배포할 코드 준비
- 예시 디렉토리

- index.html
<!--index.html-->

<html>
<head>
    <script src="https://code.jquery.com/jquery-latest.min.js"></script>
</head>
<body>
    <p id="example">AJAX</p>
    <input type="text" id="id1" placeholder="id">
    <input type="text" id="name1" placeholder="name">
    <input type="text" id="context1" placeholder="context">
    <input type="button" id="create" value="create">
    <input type="button" id="update" value="update">
    <input type="button" id="delete" value="delete">


    <script>
    	// POST (CREATE)
        $('#create').click(function(){
            var id = $('#id1').val();
            var name = $('#name1').val();
            var context = $('#context1').val();

            var postdata = {
                'id':id, 'name':name, 'context':context
            }
            $.ajax({
                type: 'POST',
                url: '{{url_for("create")}}',
                data: JSON.stringify(postdata),
                dataType : 'JSON',
                contentType: "application/json",
                success: function(data){
                    alert('성공! 데이터 값:' + data.result2['id']+" " + data.result2['name']+ " " + data.result2['context'])
                },
                error: function(request, status, error){
                    alert('ajax 통신 실패')
                    alert(error);
                }
            })
        })

        // PUT (UPDATE)
        $('#update').click(function(){
            var id = $('#id1').val();
            var name = $('#name1').val();
            var context = $('#context1').val();

            var postdata = {
                'id':id, 'name':name, 'context':context
            }
            $.ajax({
                type: 'POST',
                url: '{{url_for("put")}}',
                data: JSON.stringify(postdata),
                dataType : 'JSON',
                contentType: "application/json",
                success: function(data){
                    alert('성공! 수정된 데이터 값:' + data.result2['id']+" " + data.result2['name']+ " " + data.result2['context'])
                },
                error: function(request, status, error){
                    alert('ajax 통신 실패')
                    alert(error);
                }
            })
        })

        // DELETE (DELETE)
        $('#delete').click(function(){
            $.ajax({
                type: 'POST',
                url: '{{url_for("delete")}}',
                contentType: "application/json",
                success: function(){
                    alert('성공! 데이터 삭제 완료')
                },
                error: function(request, status, error){
                    alert('ajax 통신 실패')
                    alert(error);
                }
            })
        })
    </script>
	<table border=1 width="600">
        <thead>
        <td>목차</td>
		<td>이름</td>
		<td>내용</td>
		</thead>

    {% for row in rows %}
		<tr>
            <td>{{ loop.index }}</td>
			<td>{{ row['name'] }}</td>
			<td>{{ row['context'] }}</td>
		</tr>
	{% endfor %}
	</table>
</body>
</html>
- main.py
from flask import Flask, render_template, jsonify, request

app = Flask(__name__)

board = [{"id": 1, "name": "elice", "context": "test"}]

@app.route('/')
def index():
    return render_template('index.html', rows = board)

@app.route('/create', methods=['POST'])
def create():
    data = request.get_json()
    board.append(data)
    return jsonify(result = "success", result2= data)


@app.route('/delete', methods=['POST'])
def delete():
    del board[-1]

    return jsonify(result="success")


@app.route('/put', methods=['POST'])
def put():

    data = request.get_json()
    board.append(data)

    return jsonify(result="success",result2=data)

if __name__ == '__main__':
    app.run()
- Dockerfile
# Use the official lightweight Python image.
# https://hub.docker.com/_/python
FROM python:3.9-slim

# Allow statements and log messages to immediately appear in the Knative logs
ENV PYTHONUNBUFFERED True

# Copy local code to the container image.
ENV APP_HOME /app
WORKDIR $APP_HOME
COPY . ./

# Install production dependencies.
RUN pip install Flask gunicorn

# Run the web service on container startup. Here we use the gunicorn
# webserver, with one worker process and 8 threads.
# For environments with multiple CPU cores, increase the number of workers
# to be equal to the cores available.
# Timeout is set to 0 to disable the timeouts of the workers to allow Cloud Run to handle instance scaling.
CMD exec gunicorn --bind :$PORT --workers 1 --threads 4 --timeout 0 main:app
2. 배포
- Cloud Code extension을 설치하면 VS Code 왼쪽 하단에 아래 사진과 같이 생김
- Cloud Code 클릭

- Deploy to Cloud Run 클릭

- 서버 이름, URL 등 설정

- 준비한 코드(도커파일)이 있는 디렉토리 선택 후 Deploy 클릭

- Show Detailed log 클릭하여 상황 보기

- 완료시 URL 클릭하여 접속

3. 확인
- 해당 URL 접속


